

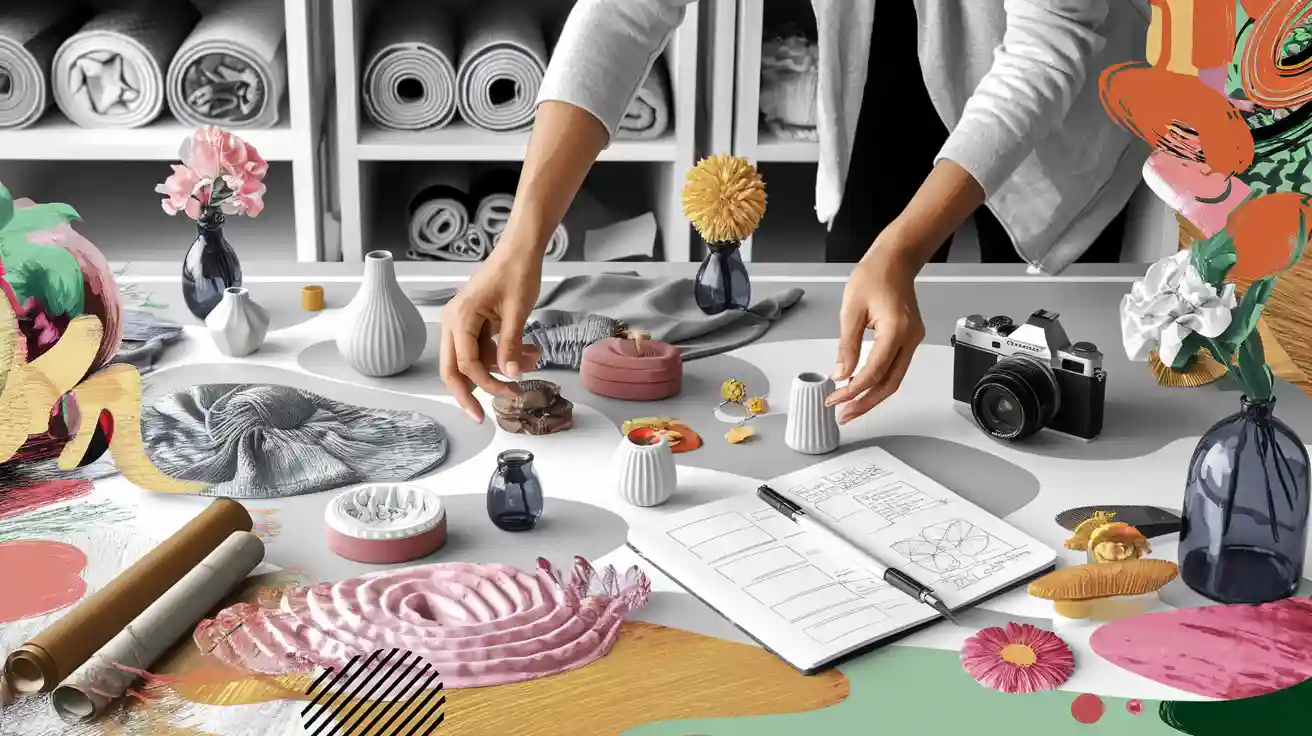
When you take photos, the right backdrops and props can make a normal scene special. These choices set the mood, add depth, and help you tell a story with your camera. See how they help:
Colors in backdrops show how people should feel. Warm colors give energy. Cool colors make things calm or a little sad.
Props add meaning and help explain the scene. They work best when you use symbols and textures that match your theme.
Lighting and composition help guide where people look. This makes your photos more interesting.
If you want great photos, let ideas inspire you. Try new things, change how you arrange things, and let each photo shoot give you new ideas for your backdrops and props.
Why Backdrops and Props Matter
Visual Impact
When you set up your photo, the first thing people notice is the background and the objects around your subject. Backdrops and props help you create a clean, distraction-free space. This makes your subject stand out and look more professional. You can use solid color backdrops to control the mood and keep things simple. Different materials, like paper or canvas, change how light looks in your photo. Some backdrops add texture, which gives your picture more depth and makes it pop.
Solid color backdrops make editing easier and keep the focus on your subject.
Textured backdrops, like muslin or canvas, add shadows and dimension.
The right backdrop helps you avoid unwanted reflections and keeps your photo looking sharp.
Tip: Try moving your subject a little farther from the backdrop. This helps you control shadows and makes your photos look more three-dimensional.
Storytelling
Backdrops and props do more than just fill space. They help you tell a story. When you pick the right props, you add meaning and context to your photos. For example, a stack of books can show learning, while flowers can bring life and color. Props like mirrors or trays add layers and make your photos more interesting. This is the art of storytelling in photography—using simple objects to share a message or feeling.
Props give your photos a unique touch and help people connect with your story.
They can show what a brand stands for or highlight special features of a product.
Good storytelling makes your photos memorable and helps them stand out.
Mood Setting
You can use backdrops and props to set the mood for your shoot. A soft, blue backdrop feels calm. A bright red one feels bold and exciting. Textures like stone or wood make your scene feel real and cozy. When you choose props that match your theme, you create harmony in your photo. This makes your images more engaging and helps people feel something when they look at them.
Backdrops act as the stage, setting the scene for your subject.
Props add depth and help viewers imagine the story behind the photo.
Thoughtful choices make your photos feel complete and boost engagement.
Choosing Backdrops and Props
Purpose and Style
When you start planning your shoot, you need to think about the purpose and style before picking any backdrop boards or photo props. Ask yourself: What story do you want to tell? Are you shooting for a brand, a product, or a personal project? Your answers will help you make the right backdrop choice and select good props to use.
Here’s how professional photographers decide on purpose and style:
Pick a theme or concept for your shoot. This guides every backdrop choice and prop you select.
Choose eye-catching props that match your subject but don’t steal the spotlight.
Make sure your props and backdrop boards work together. They should never clash.
Arrange your props in a way that looks natural. Try different setups until it feels right.
Use lighting to highlight your props and set the mood.
Stick with colors and textures that go well together. This keeps your photo styling clean.
Think about how the camera sees your setup. Sometimes, a small move makes a big difference.
Take test shots. Adjust your props and backdrop boards as needed.
Don’t overdo it. The power of a good prop comes from using it thoughtfully, not piling on too many.
Place props off to the side or in the background. This keeps the focus on your main subject.
Try new combinations of props, lighting, and backdrop boards. You might find a style that fits your products perfectly.
If you shoot for a brand, match your props and backdrop boards to the brand’s style and message. For product photography, keep things simple. Use props that help tell the story but never distract from the products.
Tip: Always keep your client’s vision in mind. Ask questions about their goals and mood for the shoot. This helps you make smart choices for both props and backdrop boards.
Color and Texture
Your backdrop choice can change the whole look of your photo. The color and texture of your backdrop boards matter a lot. When you match the backdrop color to your subject and props, you create harmony. If you want your subject to stand out, pick a color that contrasts with it. For a softer look, use similar tones.
Texture adds depth to your photos. A smooth backdrop board gives a clean, modern feel. A textured one, like wood or canvas, adds warmth and makes your photo styling more interesting. In product photography, matching the texture of your backdrop boards to your products can make everything feel connected.
When you choose the right color and texture, you control the mood. A blue backdrop board feels calm. A red one feels bold. Texture can make your scene feel cozy or sleek. Always think about how your backdrop choice supports your story.
Note: Neutral backdrop boards, like gray, beige, or white, work with almost any subject. They give you flexibility and make it easy to swap out props for different looks.
Photography Backdrop Boards
Photography backdrop boards are a must-have for photo styling and product photography. They come in many materials, each with its own benefits. Here’s a quick guide to help you pick the right one:
Material |
Advantages |
|---|---|
Muslin |
Affordable, portable, washable, many colors and sizes, easy setup, durable, versatile |
Seamless Paper |
Affordable, wide color range, easy to replace, great for headshots and product photography, portable, easy storage |
Canvas |
Strong, good for painting, adds artistic style, long-lasting, perfect for portraits |
Fabric (various) |
Cost-effective, textured options like velvet, absorbs light, resists creasing, easy to hang |
Microfiber |
Wrinkle-resistant, washable, soft, supports high-def printing, many patterns |
Vinyl |
Tough, wrinkle-free, matte finish, easy to clean, vibrant colors, needs to be rolled or stored flat |
Rubber Floor Mats |
Sturdy, waterproof, blends background with floor, great for kids, pets, and product photography |
Backdrop boards let you create different looks fast. You can swap them out for each shoot. Seamless paper is popular for product photography because it gives a smooth, clean background. Muslin and canvas are great if you want texture or a hand-painted look. Vinyl and microfiber are easy to clean and last a long time.
Tip: Keep a few photography backdrop boards in neutral colors. They work for almost any shoot and make your photo styling easier.
Budget Options
You don’t need to spend a lot to get great backdrop boards or props for product photography. There are many budget-friendly ways to build your collection.
Seamless paper rolls are cheap and come in many colors. They work well for product photography and cost between $20 and $90.
Collapsible backdrop boards, like reversible black/white ones, are portable and easy to set up.
Everyday items make great photo props. Try using plant stands, trays, wood slices, books, or coasters.
Natural elements like flowers, leaves, or stones add texture and interest to your photo styling.
Repurpose things you already have at home. Borrow from friends or check local buy-nothing groups, thrift stores, or yard sales.
Shop out of season or use craft store coupons to save money.
Build a small, versatile collection of backdrop boards and props. Focus on items that work for many types of product photography.
Here’s a quick look at some popular providers and their options:
Provider |
Product Types |
Price Range |
Pros |
Cons |
|---|---|---|---|---|
VFlat World |
Duo Boards, Tabletop V-Flats |
$74.95 - $119.95 |
Foldable, double-sided, many textures/colors |
Higher price, limited sizes |
PropFace |
Waterproof PVC, Stone props |
$24.99 - $299.00 |
Affordable, unique props, many patterns |
Limited info |
Poppybee Surfaces |
Textured boards, customizable bundles |
$64+ individual, bundles $295+ |
Wide variety, customizable, discounts |
Higher individual prices |
You can get creative with your backdrop choice and photo props without breaking the bank. The best photo styling comes from smart shopping and using what you have. Remember, the right backdrop boards and props make your product photography stand out.
Arranging Backdrops and Props
Staging Your Photos
When you start staging your photos, you set the scene for a styled photo shoot. You want every shoot to look natural and inviting. Think about the story you want to tell. Choose props that match your theme and help people imagine themselves in the scene. Cozy props like blankets, coffee cups, and candles make your shoot feel warm. Natural props such as leaves, rocks, and flowers add freshness. If you want a rustic look, try old wood, burlap, or vintage items. For a cheery vibe, use colorful dishes and bright ribbons.
Use affordable backdrops like poster boards or DIY materials.
Pair props and backdrops thoughtfully so they work together.
Keep props simple. One or two key items are enough for most shoots.
Tip: After staging your photos, step back and check if your product stands out. Props should support your story, not steal the spotlight.
Composition
Photo composition shapes how people see your styled photo shoot. You want to guide their eyes to the main subject. Place your subject about 1.5 to 3 feet from the backdrop. This distance helps create depth and makes your shoot look more professional. When your subject is close to the camera, the background blurs more. If you move the subject farther away, both the subject and background look sharper.
Use props to frame your subject. Arrange them so they add balance and interest. Try different angles and setups until you find what feels right. Negative space helps your shoot breathe and keeps it from looking crowded. Reflective surfaces, like trays or mirrors, add depth and make your photo composition pop.
Plan your photo composition before you start the shoot.
Use props to highlight your product’s best features.
Keep the style consistent across all your shoots for a strong brand look.
Adjust props during the shoot to improve balance and focus.
Note: Clean props and pay attention to small details. Even tiny changes can make your styled photo shoot look more authentic.
Lighting
Lighting is key for every styled photo shoot. Good lighting separates your subject from the backdrop and adds a three-dimensional feel. Try placing your subject at least 3 feet from the backdrop. This helps avoid harsh shadows and makes your shoot look lively. Use background lighting to add depth. A dedicated light behind the subject can brighten the backdrop and create a nice glow.
You can use rim lights to highlight the edges of your subject. This makes your styled photo shoot stand out. For white backdrops, use brighter lights above the subject for a clean look. For black backdrops, keep the background lighting dim to add drama. Flags or gobos help control shadows and keep your shoot neat. Strobes or RGB LED lights let you change colors and get creative with your lighting techniques.
Experiment with different lighting setups for each shoot.
Adjust light intensity and placement to get the mood you want.
Use textured backdrops to catch light and add interest.
Make sure your lighting matches your props and theme.
Tip: Try creating subtle gradients on your backdrop with portrait lighting. This adds depth and makes your styled photo shoot look more professional.
Authenticity
Authenticity makes your styled photo shoot feel real. Arrange props so they look natural, not forced. Choose items that tell a story about your product or subject. Props like journals, pencils, or treats give clues about how people use your product. Let your subject interact with props. This helps them relax and makes your shoot more believable.
Plan your photo composition with balance and negative space. Use props to frame your subject and add depth. Avoid clutter. A minimalist approach keeps your shoot effortless and organic. Adjust props during the shoot to refine the look. Pay attention to prop angles and cleanliness for a polished finish.
Simulate real-life situations to make your shoot relatable.
Add human elements for scale and engagement.
Use color, texture, and lighting to create a cohesive styled photo shoot.
Note: Authenticity comes from thoughtful choices. Every prop and backdrop should support your story and help viewers connect with your shoot.
Product Photography Backdrops
Material Choices
When you plan a product photography shoot, you want backdrop boards that help your product look great. There are many types of backdrop boards. Each one makes your photos look different. Seamless paper gives a smooth surface that does not shine. You can use it for big or small scenes. It is easy to cut and replace. But it can crease if you do not store it flat. Muslin backdrop boards have texture and add depth. They make your scene feel cozy or artsy. Muslin is easy to wash and carry. But it can wrinkle if you fold it the wrong way.
Printed canvas backdrop boards give strong color and texture. They last a long time and you can use them again. But they cost more and need careful storage. Polyester backdrop boards are light and easy to wash. You can fold them and take them anywhere. They do not wrinkle much, so your products look neat. Vinyl backdrop boards are waterproof and strong. You can clean them fast if your products are messy. They come in many colors and patterns. But sometimes they look shiny in photos.
Here’s a table to help you compare backdrop boards for product photography:
Material |
Pros |
Cons |
|---|---|---|
Seamless Paper |
Smooth, easy to replace, large sizes |
Creases, not water-resistant |
Muslin |
Textured, washable, portable |
Wrinkles, needs careful folding |
Canvas |
Rich color, reusable, durable |
Expensive, needs careful storage |
Polyester |
Lightweight, washable, wrinkle-resistant |
May lack crispness in close-ups |
Vinyl |
Waterproof, easy to clean, durable |
Can look glossy, heavy in cold |
Foam Board |
Budget-friendly, portable, customizable |
Fragile, temporary use |
You can also make your own backdrop boards for product photography. Try using construction paper, painted foam boards, or ceramic tiles. These ideas save money and let you be creative with your product scenes.
Scene Setup
When you set up your product photography scene, pick backdrop boards that fit your products and style. Large backdrop boards help you make bigger scenes. You can move your products around and try new angles. This gives you more ways to show off your product. For small products, use smaller backdrop boards for close-up shots.
Start by picking backdrop boards that match your products. Put your products about 1.5 to 3 feet from the backdrop boards. This space helps you control shadows and makes your photos look better. Arrange your products and props so they look natural. Use neutral color backdrop boards if you want to change props or shoot many products at once.
Lighting is very important in product photography. Use lights to make your products stand out from the backdrop boards. Try putting a light behind your products to make the backdrop boards glow. This trick helps set the mood and draws attention to your products. If you want more depth, use textured backdrop boards or shiny surfaces.
Remember, the right backdrop boards and props help you show off your product and tell a story. Try new setups and see what works best for your products. The right backdrop boards will make your product photography stand out every time.
Common Mistakes
Overcrowding
You might feel tempted to add lots of props to your scene, but too many can make your photo look messy. When you fill your shoot with extra items, the main subject gets lost. Your viewer may not know where to look. Using fewer props or keeping some empty space helps your subject stand out. Negative space brings balance and makes your photo feel clean. If you want to add text later, open areas in your image make that easy. Try to keep your backdrop boards simple and use only what you need for your story.
Tip: Less is more. Choose one or two props that fit your theme and let your subject shine.
Clashing Colors
Color choices matter a lot in every shoot. If your backdrop boards and props have colors that do not match, your photo can look confusing. Clashing colors distract the viewer and take attention away from your subject. You want your colors to work together, not fight each other. Neutral colors on your backdrop boards help keep things calm and make editing easier. If you want to use bold colors, pick ones that go well with your subject. This way, your photo looks polished and professional.
Clashing colors can make your photo look cheap or unplanned.
Good color choices help set the right mood for your shoot.
Lighting Issues
Lighting can make or break your shoot. If you use too many props, you might get harsh shadows or uneven light. Sometimes, the backdrop boards reflect too much light or create glare. This can hide details or make your photo look flat. To fix this, use soft lighting like a softbox or a light tent. Keep your lighting setup the same for each shot. Check your camera’s screen to make sure nothing is too bright or too dark. When you control your lighting, your subject and backdrop boards both look their best.
Note: Even lighting helps your props and subject work together, not against each other.
Ignoring Subject
The subject should always be the star of your shoot. If you focus too much on props or backdrop boards, your subject can get lost. A busy background or too many patterns will pull attention away. Keep your setup simple and make sure the subject stands out. Place your props and backdrop boards so they support your story, not steal the spotlight. Always check your frame before you take the shot. Ask yourself, “Does my subject pop?” If not, remove or move things until it does.
The subject comes first. Everything else should help tell its story.
Checklists for Shoots
Pre-Shoot
Getting ready for a shoot makes everything run smoother. You want to start with a solid plan. Here’s a checklist to help you prepare:
Select props that match your theme and make your subject pop.
Organize props by size, color, and material so you can grab what you need fast.
Prepare backup props and wardrobe options in case something changes during the shoot.
Make sure your backdrops are wrinkle-free and set up for your lighting.
Scout your location before the shoot to check lighting and backdrop options.
Create a detailed shot list with notes about props and backgrounds. Use a shareable format like Google Docs.
Assign roles to your team for props and wardrobe management.
Check the weather and bring weather-appropriate props or wardrobe if you’re shooting outside.
Tip: A good pre-shoot checklist helps you avoid surprises and keeps your shoot on track.
On-Set
When you arrive at your shoot, you want to keep things simple and professional. Here are some steps to follow:
Store fabric backdrops by rolling them and keeping them in bags.
Avoid using too many props or patterns that distract from your subject.
Extend your backdrop to the floor for a seamless look.
Position your backdrop so there are no gaps or awkward transitions.
Use blutack or whitetac to keep props from moving or rolling during the shoot.
Hang props with sticky hooks or fishing line if needed.
Align props with rulers or t-squares for a neat composition.
Secure backdrops and props with bull clips or A-clamps.
Clean props with microfiber cloths before taking final shots.
Use washi tape for temporary placement without damaging surfaces.
Note: Keeping your shoot area tidy helps your subject stand out and makes your photos look professional.
Post-Shoot
After your shoot, you want to wrap up and get ready for editing. Here’s what you should do:
Review your shot list to make sure you captured every planned image.
Check your photos for dust, fingerprints, or unwanted reflections.
Pack up props and backdrops carefully to keep them in good condition for your next shoot.
Save your shot list and notes for future shoots.
Share feedback with your team about what worked and what you want to improve.
Organize your files and back up your images right after the shoot.
Task |
Why It Matters |
How to Do It |
|---|---|---|
Review shots |
Catch missed details |
Compare to shot list |
Clean props |
Avoid editing problems |
Use soft cloths |
Pack up carefully |
Protect your gear |
Use bags and boxes |
Share feedback |
Improve next shoot |
Talk with your team |
Back up images |
Prevent data loss |
Use cloud or drives |
Remember: A strong post-shoot routine saves you time and keeps your next shoot running smoothly.
You now have the tools to create high-quality photos with backdrops and props that fit your style. Start by thinking about your brand and choose props that add meaning without stealing the show. Try new ideas and let inspiration guide you. Talk with your clients to learn what matters most to them. Every session is a chance for inspiration and growth. Keep learning, keep experimenting, and watch your skills shine.


